
Many of us have grown weary of walking to check your shot placement when sighting in your rifle or doing load development. Many people end up buying a nice spotting scope for around $1000, but then a few years ago, we started seeing target cams like the one Caldwell sells for $318 and the Bullseye cam for a little more. I’m a technology gadget sucker as much as the next guy, but I resisted the urge to buy one of these remote viewers, mostly because of the price.
In the past few years, the drone market has gone crazy and the parts for drones are readily available online. I did the math the other day and realized, I could buy all of the components necessary to build a target cam for under $100 with only 4 parts ordered from Amazon. You just need a camera, a transmitter, an antenna, and a receiver.
The Camera

After a little research I bought the RunCam Eagle 2 Pro. This camera has 800 TVL resolution and I wanted something with a moderately high resolution so we can see the holes on the target. This camera was $49.99. It hind sight I would have gone with something like the Caddx Turbo Micro which has 1000 TVL and only costs $29.99. I did not know at the time which cameras were compatible. I have since learned that nearly all FPV (First Person Viewer) cameras can be wired to work.
The Transmitter

There are many choices in transmitters and at this time the 5.8G transmitters are the most common and should serve you well. The 2.4 G transmitters claim to have more range at the same wattage, but there are limited components available at this time. I wanted something with the highest wattage i could find so I went with the AKK X2 Ultimate which has an adjustable output from .01 mW to 1000 mW. It will operate on any voltage from 7 to 26 volts which opens a lot of options for powering the device. This one costs $24.99, but it would be a marginal compromise to go with an 800 mW transmitter and save about $5. There is an inverse square relationship between wattage and range. It takes 4 times the wattage to double the range. The difference between 800 mW and 1000 mW is pretty insignificant. Keep in mind that this transmitter comes set at the low wattage, so plan on bumping it up before you take it outside and test it. It will easily receive over 100 yards at the lowest setting as long as you have no obstructions.
The Antenna
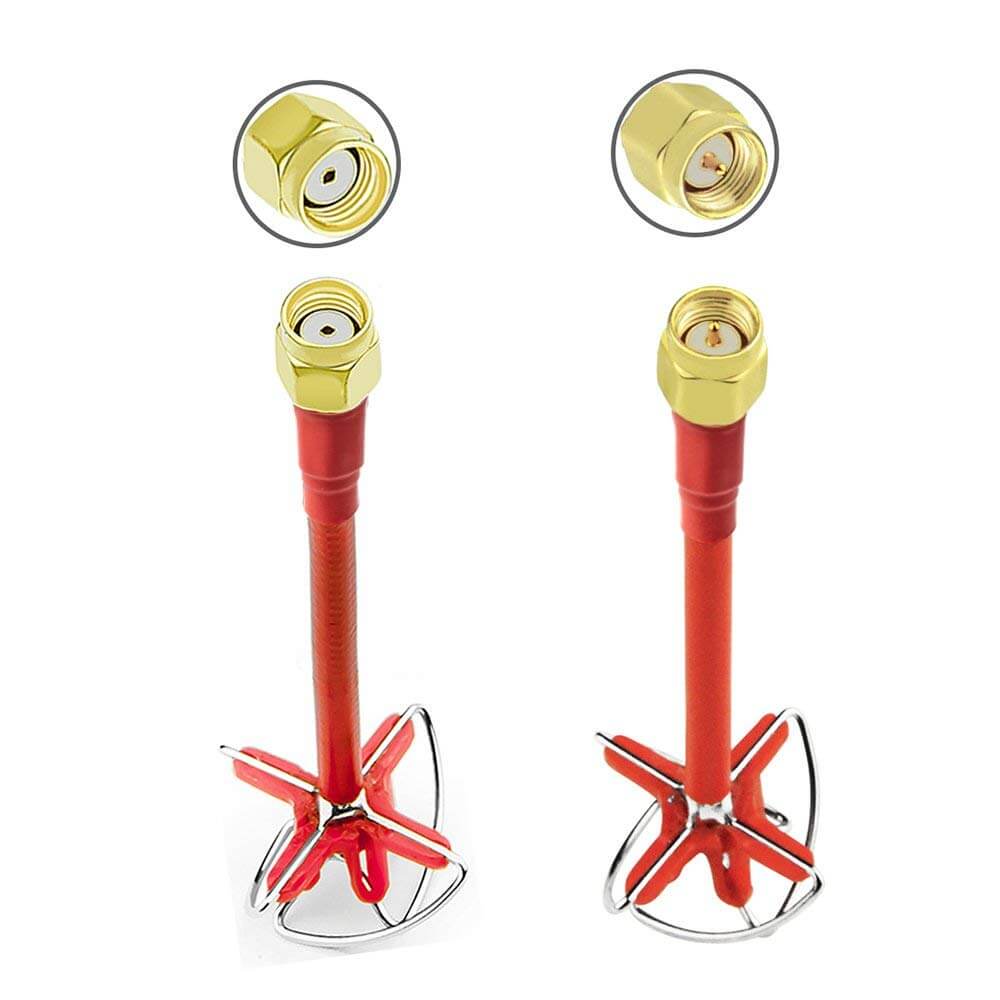
A good antenna and proper placement can affect range more than wattage so I went with the AKK Cloverleaf Antenna which conveniently came in pairs for under $5.

After some experimenting and more research, I think I would have simply purchased a camera/transmitter/antenna combo for $35.99 to get started. Amazon will suggest the antennas and the receiver as a package deal for $74.96 when you look at the details.
The 5.8G Receiver
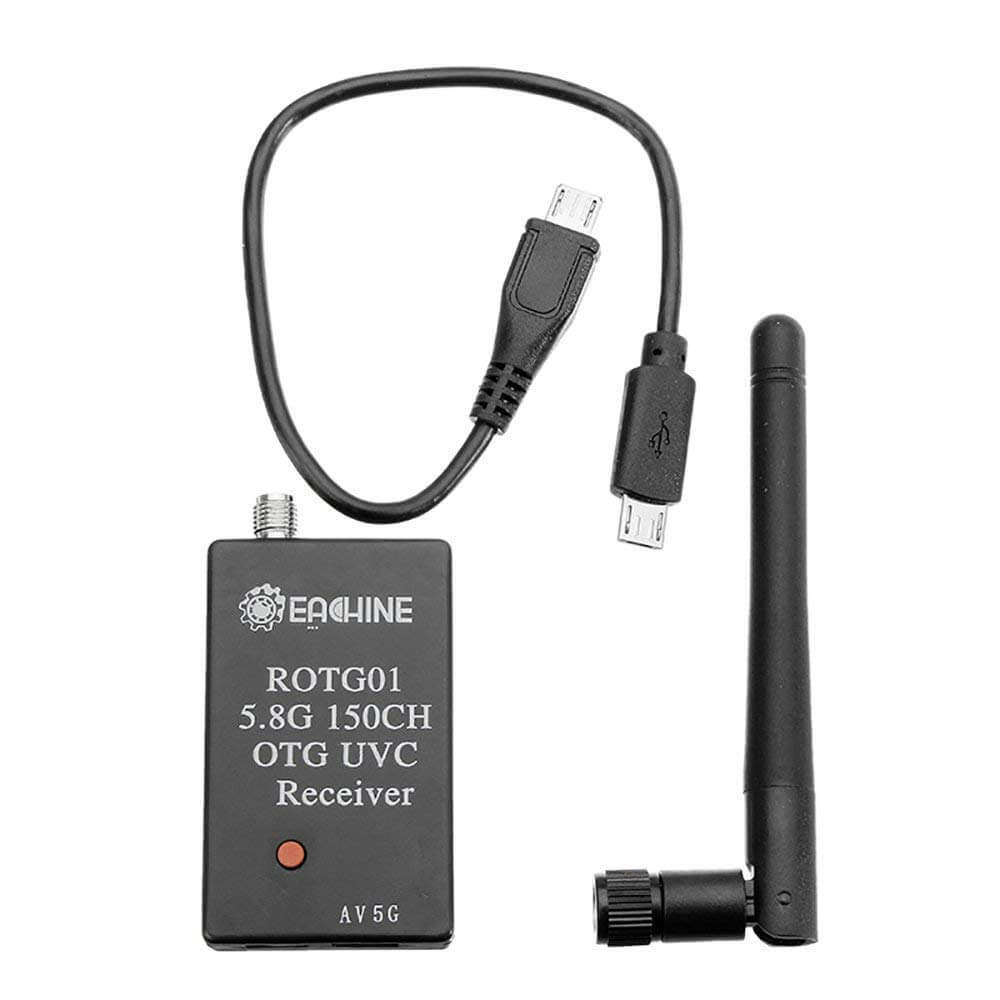
The Receiver is a self contained USB box with no wiring or set-up required. Just plug it into your smart phone or computer and it will recognize as a webcam. Press and hold the red button to scan for the strongest signal available and it will lock in automatically. The micro-USB dongle is not bi-directional, so if you have problems, switch ends. A regular USB to microUSB cord (Like a phone charger) works fine to connect to a computer. This receiver also receives the audio if it is being transmitted, but you will need to connect to the separate audio output port on the bottom and connect so some sort of audio receiver or amplifier. As a target camera, I don’t know why anyone would need audio, but it could be used for other things and the capability is there.
Other Options:
12v Dry Cell Battery – $19.99
Solar Charger – $11.99 or Radio Shack 9v 1W – $7.99
9v Rechargable 4Pack with charger -$22.99
9V Battery Connectors 10Pack -$5.99
Voltage Regulator – $9.99
Telephoto Lens – $10.03
The Assembly Process
My first observation was the difference in the plug styles, but after studying the function of the wires, it was obvious that they could simply be soldered as needed. The camera has a positive and negative power input, a video and an audio output and a BatV line to monitor the battery voltage and display it on the screen. Just connect the power input voltage to the output power lines from the transmitter and the video and audio output lines to the transmitter audio and video and run the BatV line directly to the main power supply. The Transmitter will just need to be connected to the battery and it should be up and running. This will sip pretty lightly on your battery if you keep the wattage low. It ran on a 9v battery for quite a while before noticing any change in the voltage. The 12V sealed lead battery should run for a very long time. I will report as I monitor the actual life on a charge.
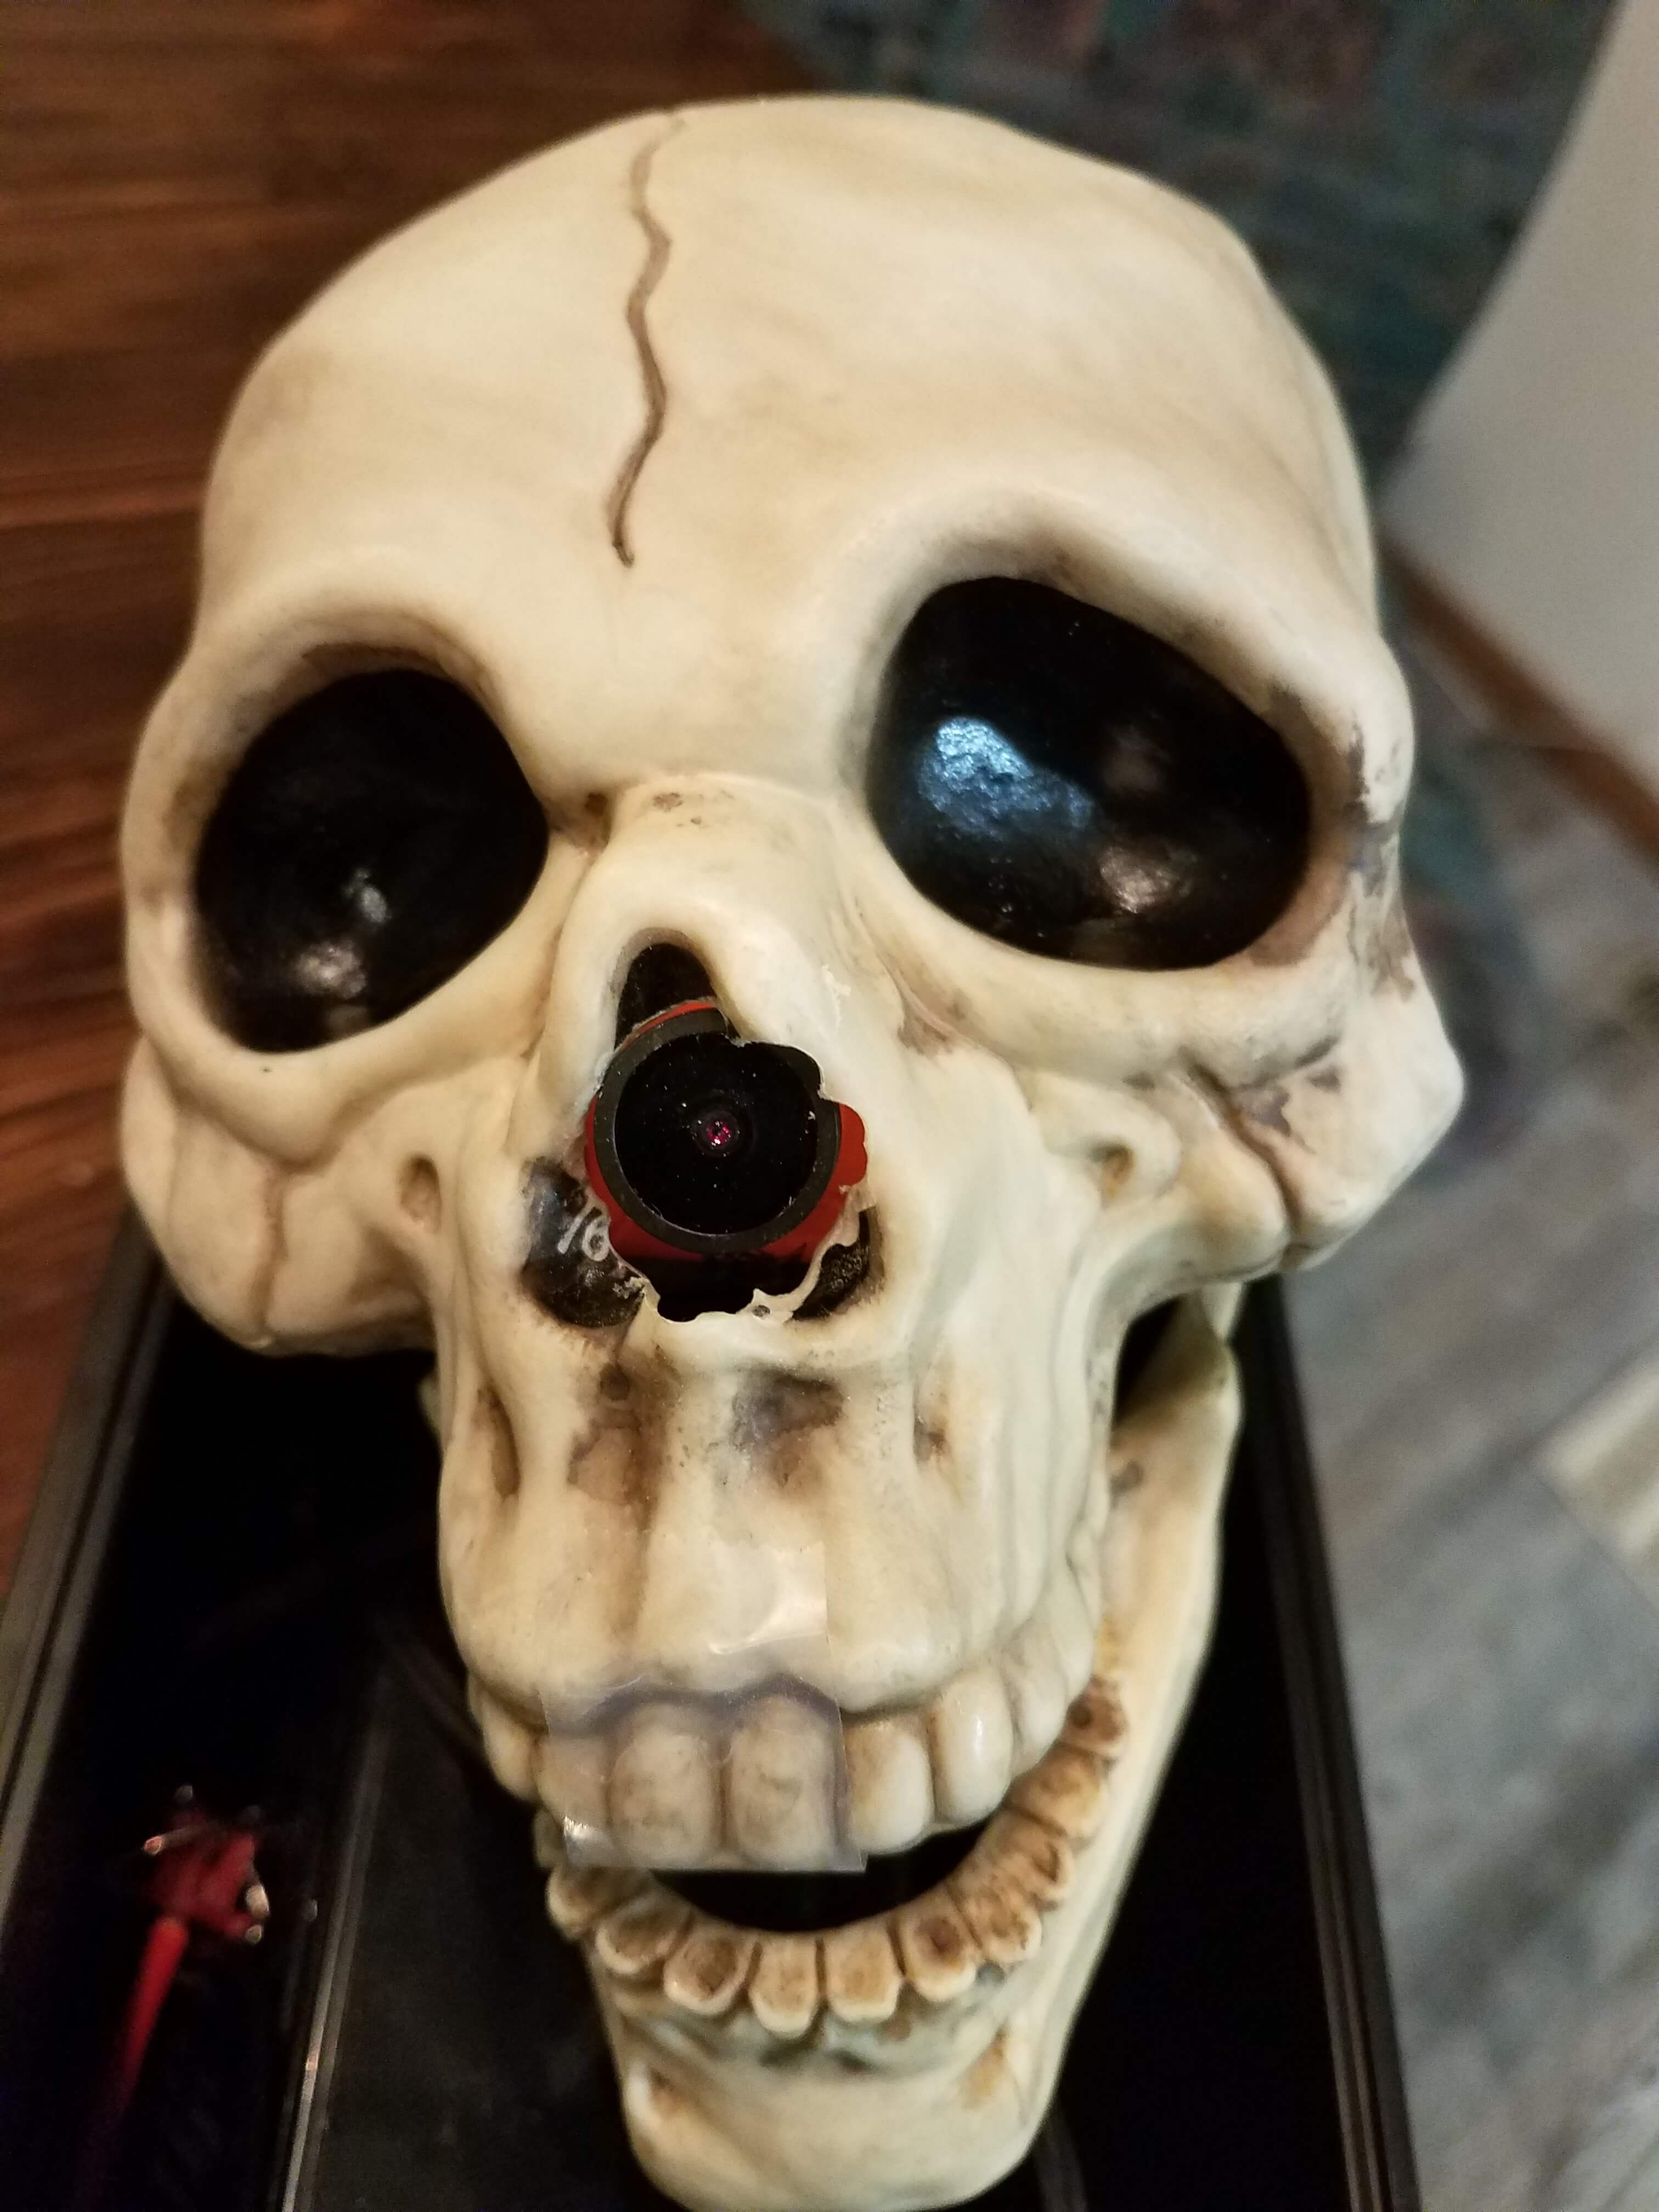
 On a cold winter day I started the assemble and decided to find a creative container for this remote viewer. After a lot of trimming and epoxy messes I got the camera to fit nicely into the skull and mounted a bolt to the bottom for further optional stand designs. After realizing that I was going to need the telephoto lens to get far enough from the target to feel confident that no one would shoot the camera I could see that the cool skull idea was not going to be the best. I ended up going back to the basics and mounting everything in an ammo can with a hole cut for the camera and the antenna mount. This is a much more durable option and with some blocks you can point it wherever you want. The telephoto lens allows you to get about 8′ from the target and still see the holes.


The Viewer
The receiver is recognized by your smart phone or computer as a webcam so any software that can view a webcam can see that the receiver gets from the transmitter. I have had good luck with the GoFPV app on the phone and YAWCAM on the computer. The phone app will allow some digital zooming capability which helps and you can also snap a picture at any time. YAWCAM is the most robust free PC application I could find. It allow you to save video or snapshots and even upload them to wherever you designate.
After a little thinking I figured the simplest way for someone to grab the camera and use it would be to skip the need for an FPV viewer app on their phone. I connected the receiver to a desktop and set up YAWCAM to upload a still shot to an FTP server every 30 seconds. This allows anyone to pull up the webpage and view the latest camera upload with their phone.
Another more robust option would be to use an app called “IllumiShot Target Marking Software”. It will actually mark your shots and calculate your group size. For more information go to https://illumishot.com/
If anyone tries this and finds variations that work well, please share them with me and I will add to this page so everyone can benefit. As you make modifications, here is a nice calculator to figure out the range you can expect without obstructions: http://www.maxmyrange.com/ Notice that the range doubles when you go to a 2.4Ghz system, but there isn’t as much equipment available for that.
Check back once in a while. We will be updating this page as we experiment and get more data.